farm manager Overview
The Farm Manager is Terminal Service Plus centralized farm administration user interface.
The Farm Manager goal is that the Administrator will be able to administer all his Terminal Service Plus servers from a centralized location, namely the Farm Manager application running on the Farm Controller server.
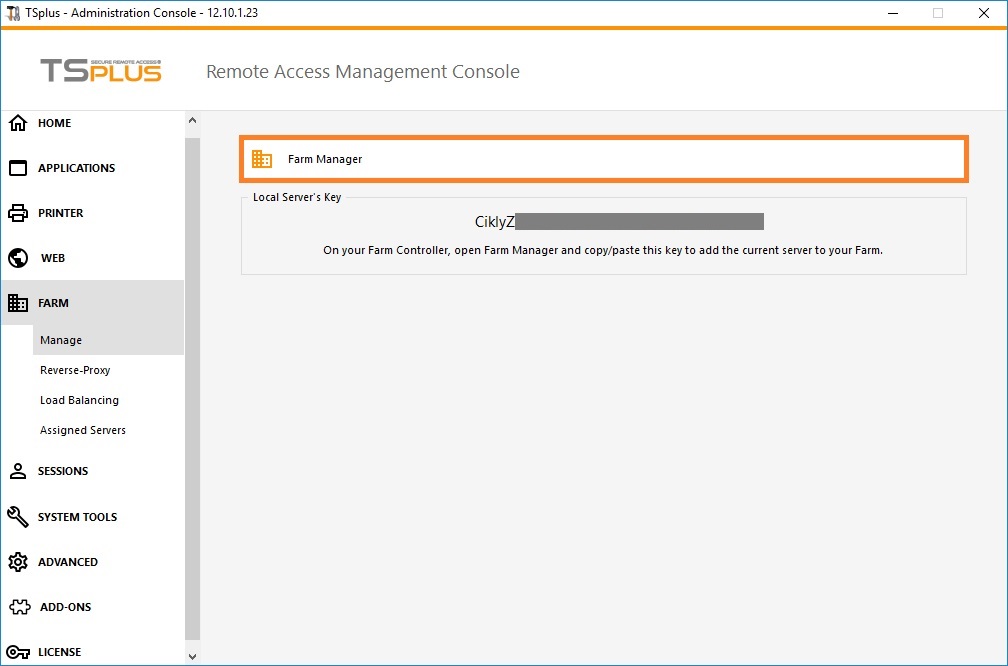
To run the Farm Manager application, open an Administrator session on the server which will become the Farm Controller, then Open Terminal Service Plus AdminTool, click on the “Farm” tab, then on “Farm Manager” as shown below:
farm manager -Servers
The “Servers” tab is displayed by default when launching the Farm Manager:
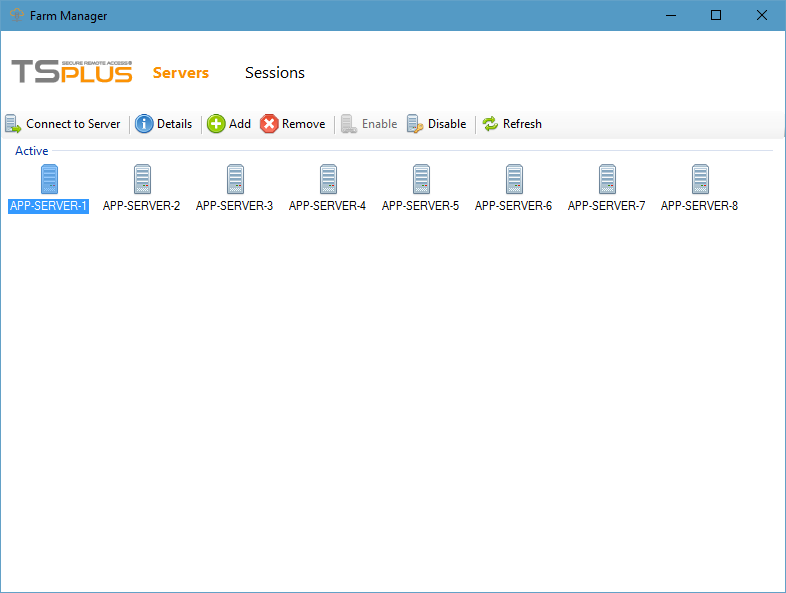
In this tab, you can see the list of Application Servers in the Farm, add a new Application Server to the Farm and perform several actions on an Application Server by selecting it and clicking on one of the following buttons:
- “Connect to Server“: open the default RDP client and connect automatically to the selected server. If your credentials are saved in MSTSC they will be used, otherwise you will have to enter your credentials.
- “Details“: show a window with the selected server details: name, hostname, ports, versions.
- “Remove“: permanently remove the selected server from the farm (you can still add it again later with the “Add” button).
- “Enable“: set the state of the selected server to “Active” (this is the default state).
- “Disable“: set the state of the selected server to “Disable” (this state will be used later for Load-Balancing feature and users-draining use cases).
- “Refresh“: perform a full refresh of the list of Application Servers.
farm manager-Sessions
Click on the “Sessions” menu to display the following tab:
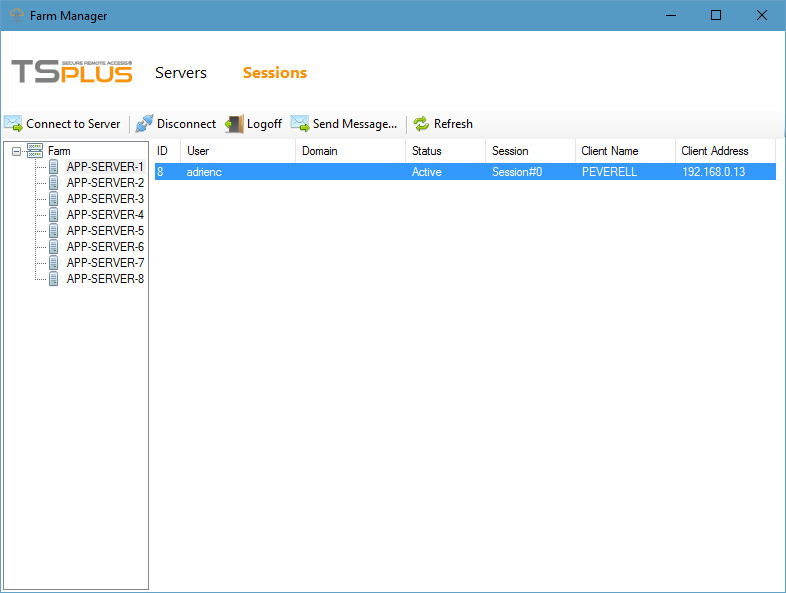
In this tab, you can see the list of User Sessions on any Application Server of the Farm, connect to the selected Application Server and perform several actions on one or several User Session(s) by selecting it/them and clicking on one of the following buttons:
- “Disconnect”: disconnect the selected user session(s) (the user will still be able to connect back to his session).
- “Logoff”: log off the selected user session(s) (every unsaved modification will be lost, applications will be shut down abruptly).
- “Send Message”: display a window to enter a title and a text, then send this message to the selected user session(s).
- “Refresh”: perform a full refresh of the list of user sessions for the selected server.
The list of User Sessions is automatically refreshed every 5 seconds. This automatic refresh stops if the selected server becomes unavailable. A click on the “Refresh” button will resume the automatic refresh.
farm manager-Settings
Click on the “Settings” menu to display the following tab:
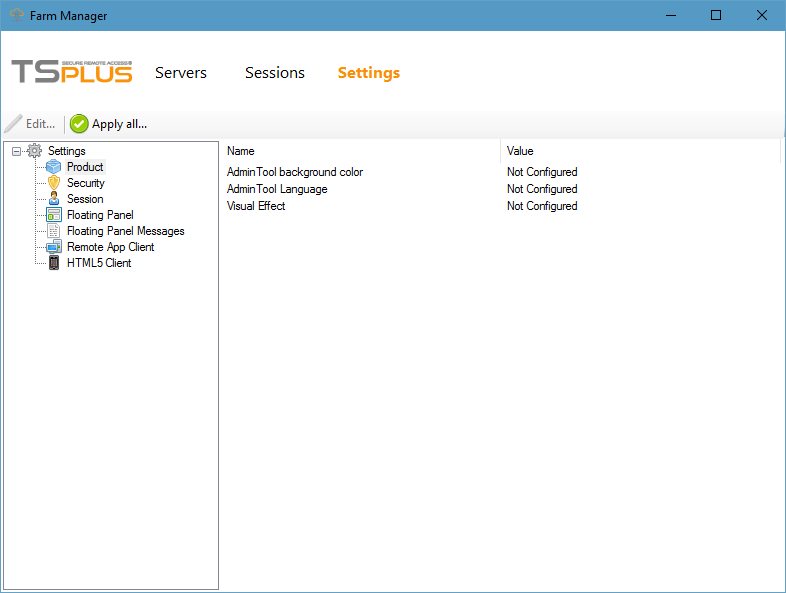
Using this Farm Manager feature, you can configure all the Application Servers in your Farm from a centralized location.
In this tab, you can see the list of all the settings which can be managed at the Farm level.
To edit a setting, either click on it in the settings list and click on the “Edit…” button or just double-click on the setting. The following window will be displayed:
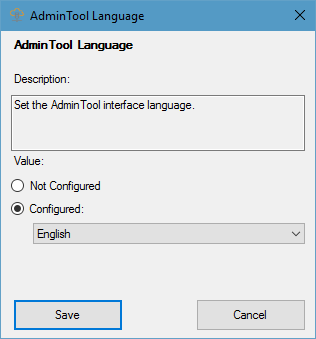
If you want to apply this setting to all the Application Servers in your Farm, click on “Configured” and choose a value.
If you do not want to set this setting at the Farm level, click on “Not Configured”. In this case, the existing values will not be changed on the Application Servers.
Once you have set all the settings you wanted to change, click on “Apply all…” to apply all your configured settings on your Farm’s servers. The following window will be displayed:
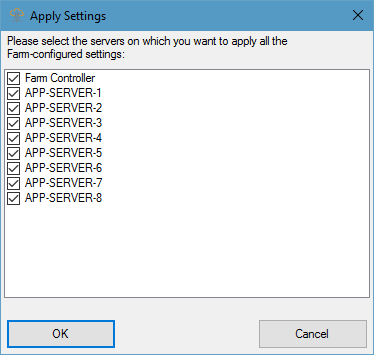
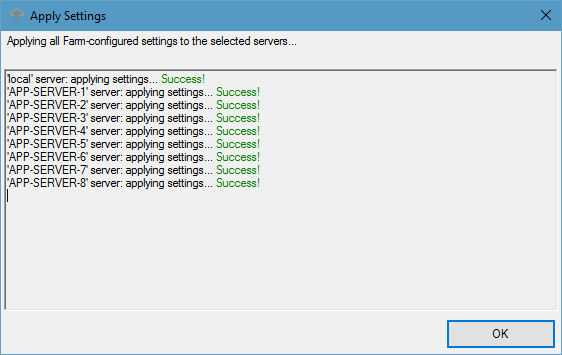
Check all the servers on which you want to apply your configured settings, then click on “OK”. The following window will be displayed, allowing you to monitor the task progress:
Load-Balancing
Click on the “Load-Balancing” menu to display the following tab:
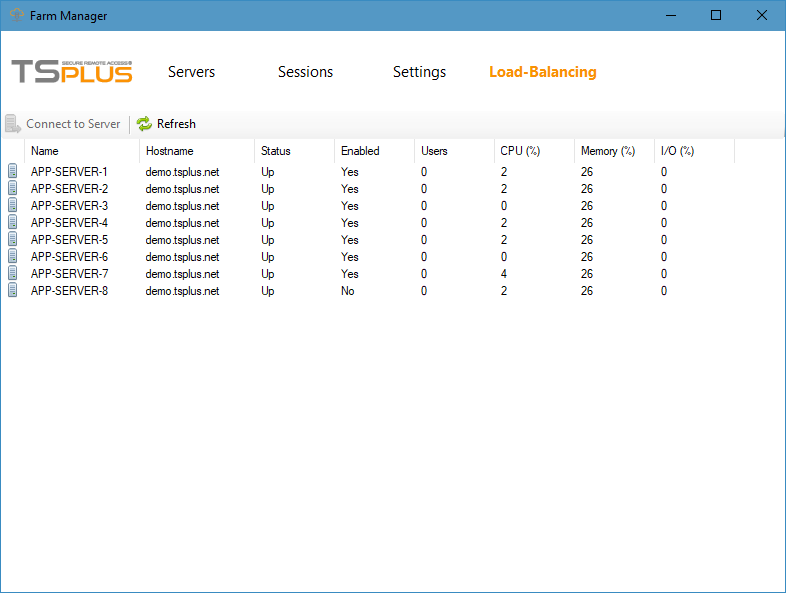
In this tab, you can see the list of Load-Balanced Servers Status and perform several actions on an Application Server by selecting it and clicking on one of the following buttons:
- “Connect to Server”: open the default RDP client and connect automatically to the selected server. If your credentials are saved in MSTSC they will be used, otherwise you will have to enter your credentials.
- “Refresh”: perform a full refresh of the list of load-balanced servers status.
The list of Load-Balanced Servers Status is automatically refreshed every 5 seconds. This automatic refresh stops if the connection becomes unavailable. A click on the “Refresh” button will resume the automatic refresh.