You can edit the provided HTML pages with Notepad or Notepad++ to customize it user interface.
index.html page
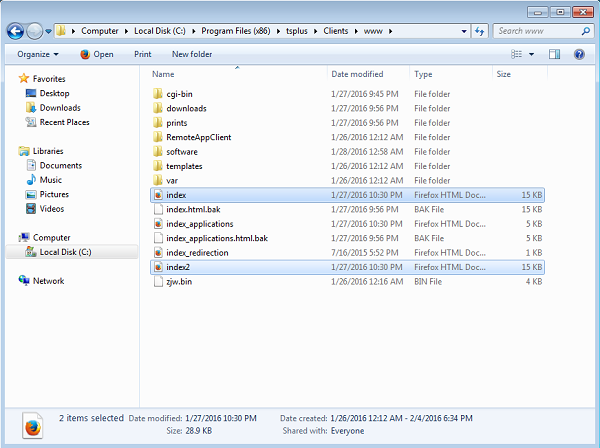
The index.html is located in Web Server root folder path.
C:\Program Files (x86)\TSplus\Clients\www
Index.html page is the default web page. It’s like a front-end Portal page with links to the connection pages which are located in \www\ folder.
This web page can be copied and renamed to allow multiple configuration and / or logon information.
For example let’s copy and rename index.html into index2.html, this page will be available using this url http://localhost/index2.html

Beware that if you change the “index.html” file name to “index2.html” and that you are using the Web Applications Portal, then you must change the following variable on this file: “page_configuration[“applications_portal”] = “index_applications.html” to “index2_applications.html” then rename the “index_applications.html” file into “index_2applications.html”.
The default index.html includes all possible options:
- RemoteApp access to applications, connection outside the Web Browser
- Connection using HTML5 from any device
- Local printing preferences
You will be able to change header and footer in the Web portal design feature on the web portal preferences tile of the Web tab.
By editing the index.html web page, you will have access to various settings.
// ————— Access Configuration —————
var user = “”; // Login to use when connecting to the remote server (leave “” to use the login typed in this page)
var pass = “”; // Password to use when connecting to the remote server (leave “” to use the password typed in this page)
var domain = “”; // Domain to use when connecting to the remote server (leave “” to use the domain typed in this page)
var server = “127.0.0.1”; // Server to connect to (leave “” to use localhost and/or the server chosen in this page)
var port = “”; // Port to connect to (leave “” to use localhost and/or the port of the server chosen in this page)
var lang = “as_browser”; // Language to use
var serverhtml5 = “127.0.0.1”; // Server to connect to, when using HTML5 client
var porthtml5 = “3389”; // Port to connect to, when using HTML5 client
var cmdline = “”; // Optional text that will be put in the server’s clipboard once connected
// ————— End of Access Configuration —————
For example I will preset demo/Psw as login/password by editing:
var user = “Demo”; var pass = “Psw”;
Doing so, pre-filled credentials are made visible at each visit of the portal.
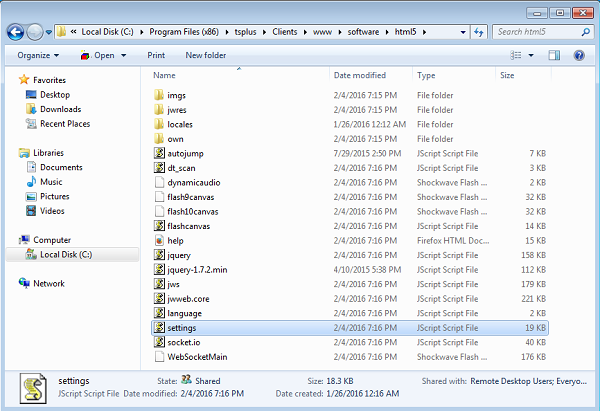
Another very important configuration file is settings.js, located in C:\Program Files (x86)\TSplus\Clients\www\software\html5:

This file contains various settings for the HTML5 web client like disabling sound, clipboard or allowing session reconnection if browser tab is closed.
Disabling clipboard:
“W.clipboard = “yes”; //or “no” “
Disabling sound is done with this setting:
“W.playsound = false;”
Changing default resolution for Mobile devices:
“W.viewportwidth = “1024” ” – The height gets computed by browser.
Forcing HTTPS for remote connection
“W.forcealways_ssl = true;”
Allowing session reconnection when browser tab is closed:
“W.send_logoff = false;”
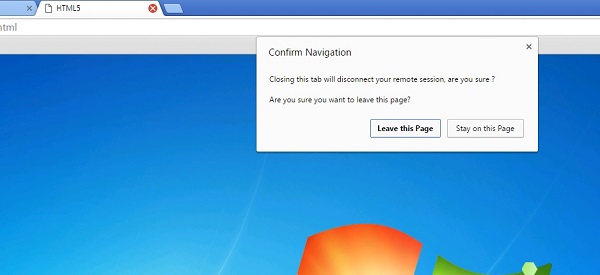
Adding a warning pop up to prevent closing the browser tab:
search the “W.pageUnloadMessage = “” ” parameter.
I have set an example of message to be used below :
W.pageUnloadMessage = “Closing this tab will disconnect your remote session, are you sure ?”; //Dialog to return when page unloads.
//1. Important notice, own dialogs are not supported in all browsers.
//2. HTML standard does not distinguish between page refresh and page close action, the dialog will popup on page refresh too.

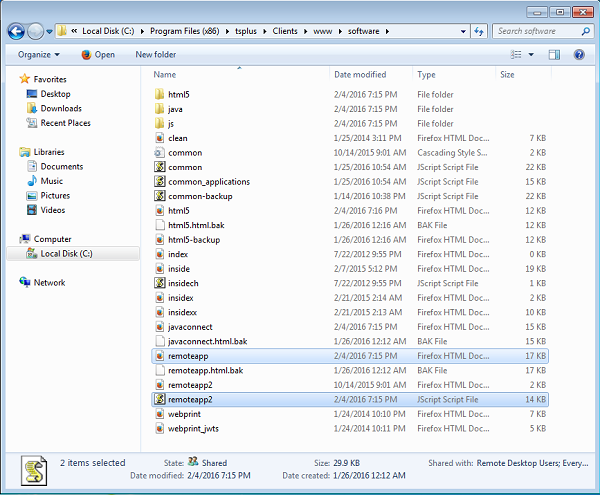
The general settings for the RemoteApp web page is stored on the software folder, in two different files: remoteapp.html and remoteapp2.js.

Example of available settings present in remoteapp2.js :
// Remote Desktop Server
var remoteapp2_server = ”; var remoteapp2_port = ‘443’;
// Windows Authentication
var remoteapp2_user = ”; var remoteapp2_psw = ”; var remoteapp2_domain = ”;
// Optional Command Line Parameters
var remoteapp2_apppath = ”;
// Seamless/RemoteApp mode
var remoteapp2_wallp = ‘green’; var remoteapp2_seamless = ‘off’; var remoteapp2_remoteapp = ‘on’;
// Screen
var remoteapp2_color = ’32’;
var remoteapp2_full = ‘2’;
var remoteapp2_width = ”;
var remoteapp2_height = ”;
var remoteapp2_scale = ‘100’;
var remoteapp2_smartsizing = ‘1’;
var remoteapp2_dualscreen = ‘off’;
var remoteapp2_span = ‘off’;
// Disks mapping (required for printing)
var remoteapp2_disk = ‘1’;
// Printing
var remoteapp2_printer = ‘off’;
var remoteapp2_preview = ‘off’;
var remoteapp2_default = ‘on’;
var remoteapp2_select = ‘off’;
// Hardware
var remoteapp2_com = ‘0’;
var remoteapp2_smartcard = ‘0’;
var remoteapp2_serial = ‘off’;
var remoteapp2_usb = ‘off’;
var remoteapp2_sound = ‘on’;
var remoteapp2_directx = ‘off’;
// Miscellaneous
var remoteapp2_alttab = ‘0’;
var remoteapp2_firewall = ‘1’;
var remoteapp2_localtb = ’32’;
var remoteapp2_lock = ‘off’;
var remoteapp2_rdp5 = ‘off’;
var remoteapp2_reset = ‘off’;